5th March, 2023
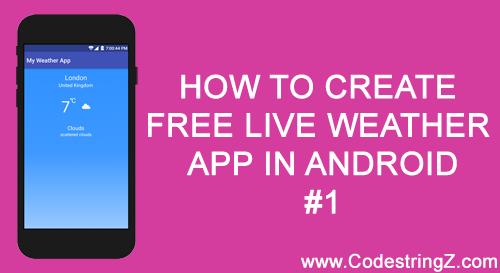
Hi Developer! In this Android project you will learn how to Create Free Live Weather App In Android – Step by step.
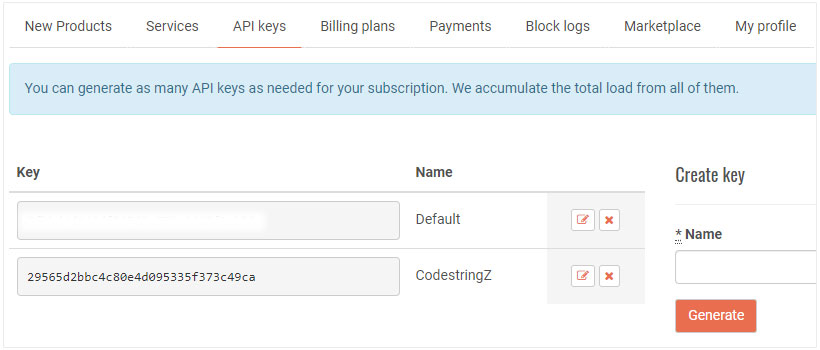
Step 1: Get OpenWeatherMap API Key
OpenWeatherMap is an online service that provides weather data. You need to get an API key to use the OpenWeatherMap service on your Android project. Sign up or login to the OpenWeatherMap and get your API Key.

API CALL:
This is the sample API URL to get current weather.
http://api.openweathermap.org/data/2.5/weather?q=city,country&APPID={your api key}
For example,
http://api.openweathermap.org/data/2.5/weather?q=London,uk&appid=your_api_key
API RESPONSE:
Please see the example of API JSON response.
{
  "coord": {
    "lon": -122.08,
    "lat": 37.39
  },
  "weather": [
    {
      "id": 800,
      "main": "Clear",
      "description": "clear sky",
      "icon": "01d"
    }
  ],
  "base": "stations",
  "main": {
    "temp": 282.55,
    "feels_like": 281.86,
    "temp_min": 280.37,
    "temp_max": 284.26,
    "pressure": 1023,
    "humidity": 100
  },
  "visibility": 16093,
  "wind": {
    "speed": 1.5,
    "deg": 350
  },
  "clouds": {
    "all": 1
  },
  "dt": 1560350645,
  "sys": {
    "type": 1,
    "id": 5122,
    "message": 0.0139,
    "country": "US",
    "sunrise": 1560343627,
    "sunset": 1560396563
  },
  "timezone": -25200,
  "id": 420006353,
  "name": "Mountain View",
  "cod": 200
}
Step 2: Create New Project
Create a new project in Android Studio from File ⇒ New Project and select Empty Activity from the templates.
2.1 Enable View Binding
Open your app level build.gradle and enable View Binding.
Project ⇒ app ⇒ build.gradle
apply plugin: 'com.android.application'

android {
    viewBinding {
        enabled = true
    }
    /*other stuff*/
}
2.2 Add Internet permission
Open AndroidManifest.xml and add the internet usage permission.
<uses-permission android:name="android.permission.INTERNET" />
Step 3: Design Live Weather Layout
Now next step, design layout for the Live Weather App.
3.1 Create app background drawable (optional)
First create a drawable resource for the app background.
Project ⇒ app ⇒ src ⇒ main ⇒ res ⇒ drawable ⇒ background1.xml
<?xml version="1.0" encoding="utf-8"?>
<shape xmlns:android="http://schemas.android.com/apk/res/android"
    android:shape="rectangle" >

    <gradient
        android:angle="90"
        android:endColor="#3091FF"
        android:centerColor="#3D98FF"
        android:startColor="#A1CDFF"
        android:type="linear" />
</shape>
3.2 Design Weather Main Layout
Open the activity layout file and add the code given below.
<?xml version="1.0" encoding="utf-8"?>
<RelativeLayout xmlns:android="http://schemas.android.com/apk/res/android"
    xmlns:tools="http://schemas.android.com/tools"
    android:layout_width="match_parent"
    android:layout_height="match_parent"
    android:background="@drawable/background1"
    tools:context=".MainActivity">

    <ScrollView
        android:layout_width="match_parent"
        android:layout_height="match_parent">

        <LinearLayout
            android:layout_width="match_parent"
            android:layout_height="wrap_content"
            android:layout_marginTop="15dp"
            android:orientation="vertical">

            <TextView
                android:id="@+id/cityTextView"
                android:layout_width="match_parent"
                android:layout_height="wrap_content"
                android:gravity="center"
                android:text="City"
                android:textColor="#FFFFFF"
                android:textSize="22sp" />

            <TextView
                android:id="@+id/countryTextView"
                android:layout_width="match_parent"
                android:layout_height="wrap_content"
                android:gravity="center"
                android:text="Country"
                android:textColor="#FFFFFF"
                android:textSize="16sp" />

            <LinearLayout
                android:layout_width="match_parent"
                android:layout_height="wrap_content"
                android:layout_marginTop="25dp"
                android:orientation="horizontal"
                android:baselineAligned="false">

                <LinearLayout
                    android:layout_width="0dp"
                    android:layout_height="wrap_content"
                    android:layout_weight="1"
                    android:gravity="end|center"
                    android:layout_gravity="center"
                    android:orientation="horizontal">

                    <TextView
                        android:id="@+id/temperatureTextView"
                        android:layout_width="wrap_content"
                        android:layout_height="wrap_content"
                        android:text="15"
                        android:textColor="#FFFFFF"
                        android:textSize="52sp" />

                    <TextView
                        android:layout_width="wrap_content"
                        android:layout_height="wrap_content"
                        android:layout_gravity="top"
                        android:text="\u2103"
                        android:textColor="#FFFFFF"
                        android:textSize="22sp" />
                </LinearLayout>

                <RelativeLayout
                    android:layout_width="0dp"
                    android:layout_height="wrap_content"
                    android:layout_weight="1"
                    android:layout_gravity="center"
                    android:padding="10dp">

                    <ImageView
                        android:id="@+id/weatherIconImageView"
                        android:layout_width="wrap_content"
                        android:layout_height="wrap_content"
                        android:adjustViewBounds="true"
                        tools:ignore="ContentDescription"
                        android:src="@mipmap/ic_launcher"/>
                </RelativeLayout>
            </LinearLayout>

            <TextView
                android:id="@+id/weatherConditionTextView"
                android:layout_width="match_parent"
                android:layout_height="wrap_content"
                android:layout_marginTop="25dp"
                android:gravity="center"
                android:text="Condition"
                android:textColor="#FFFFFF"
                android:textSize="18sp" />

            <TextView
                android:id="@+id/weatherDescriptionTextView"
                android:layout_width="match_parent"
                android:layout_height="wrap_content"
                android:gravity="center"
                android:text="Description"
                android:textColor="#FFFFFF"
                android:textSize="14sp" />
        </LinearLayout>
    </ScrollView>

    <LinearLayout
        android:id="@+id/myLoadingLayout"
        android:layout_width="match_parent"
        android:layout_height="match_parent"
        android:background="#33000000"
        android:clickable="true"
        android:focusable="true"
        android:gravity="center"
        android:orientation="vertical"
        android:visibility="gone">

        <ProgressBar
            android:layout_width="wrap_content"
            android:layout_height="wrap_content" />

        <TextView
            android:layout_width="wrap_content"
            android:layout_height="wrap_content"
            android:text="Loading data. Please wait..."
            android:textColor="#FFFFFF" />
    </LinearLayout>

</RelativeLayout>
How to Create Free Live Weather App In Android – Step by step – Part 2 →
Happy coding!
