
5th February, 2023
Hello Android learner! You will be able to create/start an android project after reading this article. This is very easy to do. So why late? Lets start.
Step 1: Start Android Studio
Start Android Studio, The startup window will appear. Select New Project.

A ⇒ Create/Start a new project.
B ⇒ If you already have an Android project, You can open the project using this option.
C ⇒ Get project from Version Control (git)
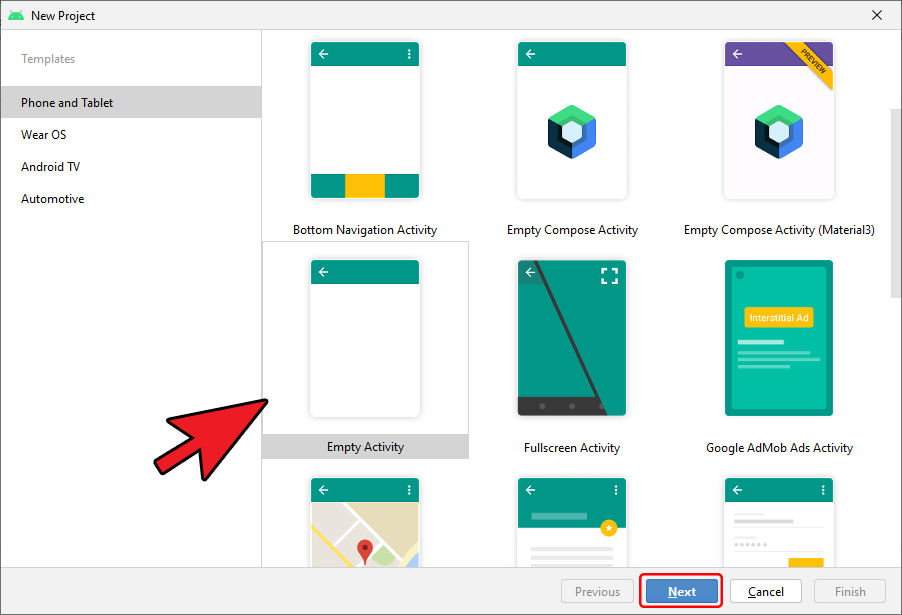
Step 2: Select An Activity
On the next window you have to select an activity. For now, simply select an Empty Activity from the list of activities.
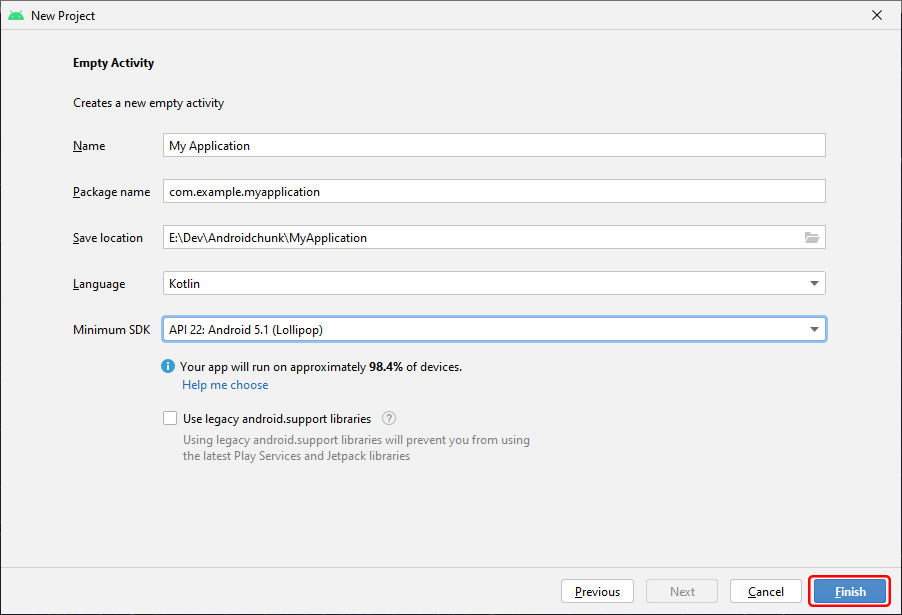
Step 3: Fill Project Details
In this window, fill in the required details about your application. Name, package name, coding language, etc. If you didn’t understand all the things here. Don’t worry I have given you a sample image below. We will learn all that in the coming chapters. After that, Click the Finish button.
Android studio will take some time to prepare the project for you. That’s it, your new Android Studio Project is ready. Happy coding!