23rd February, 2023
ImageButton is a type of Android User Interface used to display a button with an image. ImageView is the parent class of ImageButton class.
We can set the image to the ImageButton using the setImageResource(resourceId) method from the Kotlin/Java file or using the android:src attribute from the xml layout file.
<ImageButton
    android:layout_width="wrap_content"
    android:layout_height="wrap_content"
    android:src="@android:drawable/ic_media_play" />
val imageButton = findViewById<ImageButton>(R.id.playImageButton)
imageButton.setImageResource(android.R.drawable.ic_media_play)
ImageButton imageButton = findViewById(R.id.playImageButton);
imageButton.setImageResource(android.R.drawable.ic_media_play);
1. How to Create/Add ImageButton in Android Studio?
In Android, We can create/add Android ImageButton in two ways. Using Kotlin/Java code or XML layout designer. Let’s see one by one.
1.1 Create/Add ImageButton in XML layout file
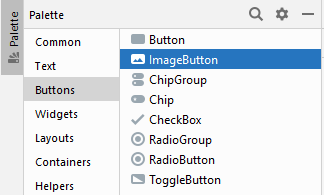
Let’s go to Android Studio, Open the relevant XML layout file to which you want to add an ImageButton. From the palette, select the ImageButton, drag and drop it onto the layout. The ImageButton is ready to use in the activity. We have taken three ImageButtons in the following sample code.
<?xml version="1.0" encoding="utf-8"?>
<RelativeLayout xmlns:android="http://schemas.android.com/apk/res/android"
    xmlns:tools="http://schemas.android.com/tools"
    android:layout_width="match_parent"
    android:layout_height="match_parent"
    tools:context=".MainActivity">

    <LinearLayout
        android:layout_width="match_parent"
        android:layout_height="wrap_content"
        android:layout_centerInParent="true"
        android:gravity="center"
        android:orientation="horizontal">

        <ImageButton
            android:id="@+id/prevImageButton"
            android:layout_width="wrap_content"
            android:layout_height="wrap_content"
            android:contentDescription="previous"
            android:src="@android:drawable/ic_media_previous" />

        <ImageButton
            android:id="@+id/playImageButton"
            android:layout_width="wrap_content"
            android:layout_height="wrap_content"
            android:contentDescription="play"
            android:src="@android:drawable/ic_media_play" />

        <ImageButton
            android:id="@+id/nextImageButton"
            android:layout_width="wrap_content"
            android:layout_height="wrap_content"
            android:contentDescription="next"
            android:src="@android:drawable/ic_media_next" />
    </LinearLayout>
</RelativeLayout>
1.2 Create/Add ImageButton Programmatically in Android
Alternatively, We can create ImageButton programmatically using Kotlin/Java code. Create an instance of the ImageButton class by passing a context as parameter. Set the attributes according to your requirements. Add the ImageButton to the layout.
package com.androidchunk.helloimagebutton

import android.os.Bundle
import android.widget.ImageButton
import android.widget.LinearLayout
import androidx.appcompat.app.AppCompatActivity

class MainActivity : AppCompatActivity() {
    override fun onCreate(savedInstanceState: Bundle?) {
        super.onCreate(savedInstanceState)
        setContentView(R.layout.activity_main)
        //layout
        val linearLayout = findViewById<LinearLayout>(R.id.linearLayout12)

        //create image button programmatically
        val playImageButton = ImageButton(this)
        //set image src
        playImageButton.setImageResource(android.R.drawable.ic_media_play)
        //content description(alter text)
        playImageButton.contentDescription = "play"

        //add image button to the layout
        linearLayout.addView(playImageButton)
    }
}
package com.androidchunk.helloimagebutton;

import android.os.Bundle;
import android.widget.ImageButton;
import android.widget.LinearLayout;

import androidx.annotation.Nullable;
import androidx.appcompat.app.AppCompatActivity;

class MainActivity extends AppCompatActivity {

    @Override
    protected void onCreate(@Nullable Bundle savedInstanceState) {
        super.onCreate(savedInstanceState);
        setContentView(R.layout.activity_main);
        //layout
        LinearLayout linearLayout = findViewById(R.id.linearLayout12);

        //create image button programmatically
        ImageButton playImageButton = new ImageButton(this);
        //set image src
        playImageButton.setImageResource(android.R.drawable.ic_media_play);
        //content description(alter text)
        playImageButton.setContentDescription("play");

        //add image button to the layout
        linearLayout.addView(playImageButton);
    }
}
2. Android ImageButton Events
Here we have listed some frequently used Android ImageButton events.
2.1 Android ImageButton Click Event Handling
2.1.1 ImageButton Click Event in layout file
Create a method in the Activity. The method must have View as parameter.
package com.androidchunk.helloimagebutton

import android.os.Bundle
import android.view.View
import android.widget.Toast
import androidx.appcompat.app.AppCompatActivity

class MainActivity : AppCompatActivity() {
    override fun onCreate(savedInstanceState: Bundle?) {
        super.onCreate(savedInstanceState)
        setContentView(R.layout.activity_main)
    }

    fun onImageButtonClicked(view: View) {
        if (view.id == R.id.prevImageButton) {
            Toast.makeText(this, "Previous imageButton clicked", Toast.LENGTH_SHORT).show()
        } else if (view.id == R.id.playImageButton) {
            Toast.makeText(this, "Play imageButton clicked", Toast.LENGTH_SHORT).show()
        } else if (view.id == R.id.nextImageButton) {
            Toast.makeText(this, "Next imageButton clicked", Toast.LENGTH_SHORT).show()
        }
    }
}
package com.androidchunk.helloimagebutton;

import android.os.Bundle;
import android.view.View;
import android.widget.Toast;

import androidx.annotation.Nullable;
import androidx.appcompat.app.AppCompatActivity;

class MainActivity extends AppCompatActivity {
    @Override
    protected void onCreate(@Nullable Bundle savedInstanceState) {
        super.onCreate(savedInstanceState);
        setContentView(R.layout.activity_main);
    }

    public void onImageButtonClicked(View view) {
        if (view.getId() == R.id.prevImageButton) {
            Toast.makeText(this, "Previous imageButton clicked", Toast.LENGTH_SHORT).show();
        }
        else if (view.getId() == R.id.playImageButton) {
            Toast.makeText(this, "Play imageButton clicked", Toast.LENGTH_SHORT).show();
        }
        else if (view.getId() == R.id.nextImageButton) {
            Toast.makeText(this, "Next imageButton clicked", Toast.LENGTH_SHORT).show();
        }
    }
}
Open the xml layout file and set the method name as the value of the ImageButton’s onClick attribute. That’s how easy it is.
<?xml version="1.0" encoding="utf-8"?>
<RelativeLayout xmlns:android="http://schemas.android.com/apk/res/android"
    xmlns:tools="http://schemas.android.com/tools"
    android:layout_width="match_parent"
    android:layout_height="match_parent"
    tools:context=".MainActivity">

    <LinearLayout
        android:layout_width="match_parent"
        android:layout_height="wrap_content"
        android:layout_centerInParent="true"
        android:gravity="center"
        android:orientation="horizontal">

        <ImageButton
            android:id="@+id/prevImageButton"
            android:layout_width="wrap_content"
            android:layout_height="wrap_content"
            android:contentDescription="previous"
            android:onClick="onImageButtonClicked"
            android:src="@android:drawable/ic_media_previous" />

        <ImageButton
            android:id="@+id/playImageButton"
            android:layout_width="wrap_content"
            android:layout_height="wrap_content"
            android:contentDescription="play"
            android:onClick="onImageButtonClicked"
            android:src="@android:drawable/ic_media_play" />

        <ImageButton
            android:id="@+id/nextImageButton"
            android:layout_width="wrap_content"
            android:layout_height="wrap_content"
            android:contentDescription="next"
            android:onClick="onImageButtonClicked"
            android:src="@android:drawable/ic_media_next" />
    </LinearLayout>
</RelativeLayout>
package com.androidchunk.helloimagebutton;

import android.os.Bundle;
import android.view.View;
import android.widget.Toast;

import androidx.annotation.Nullable;
import androidx.appcompat.app.AppCompatActivity;

class MainActivity extends AppCompatActivity {
    @Override
    protected void onCreate(@Nullable Bundle savedInstanceState) {
        super.onCreate(savedInstanceState);
        setContentView(R.layout.activity_main);
    }

    public void onImageButtonClicked(View view) {
        if (view.getId() == R.id.prevImageButton) {
            Toast.makeText(this, "Previous imageButton clicked", Toast.LENGTH_SHORT).show();
        }
        else if (view.getId() == R.id.playImageButton) {
            Toast.makeText(this, "Play imageButton clicked", Toast.LENGTH_SHORT).show();
        }
        else if (view.getId() == R.id.nextImageButton) {
            Toast.makeText(this, "Next imageButton clicked", Toast.LENGTH_SHORT).show();
        }
    }
}
2.1.2 ImageButton Click Event in Kotlin/Java file (Runtime click event)
Alternatively, we can set a ImageButton click listener in the Kotlin/Java activity. See the sample code below.
package com.androidchunk.helloimagebutton

import android.os.Bundle
import android.view.View
import android.view.View.OnClickListener
import android.widget.ImageButton
import android.widget.Toast
import androidx.appcompat.app.AppCompatActivity

class MainActivity : AppCompatActivity() {
    override fun onCreate(savedInstanceState: Bundle?) {
        super.onCreate(savedInstanceState)
        setContentView(R.layout.activity_main)

        val playImageButton = findViewById<ImageButton>(R.id.playImageButton)
        playImageButton.setOnClickListener(object : OnClickListener {
            override fun onClick(view: View?) {
                Toast.makeText(this@MainActivity,"Play imageButton clicked",Toast.LENGTH_SHORT).show()
            }
        })
    }
}
package com.androidchunk.helloimagebutton;

import android.os.Bundle;
import android.view.View;
import android.widget.ImageButton;
import android.widget.Toast;

import androidx.annotation.Nullable;
import androidx.appcompat.app.AppCompatActivity;

class MainActivity extends AppCompatActivity {
    @Override
    protected void onCreate(@Nullable Bundle savedInstanceState) {
        super.onCreate(savedInstanceState);
        setContentView(R.layout.activity_main);

        ImageButton playImageButton = findViewById(R.id.playImageButton);
        playImageButton.setOnClickListener(new View.OnClickListener() {
            @Override
            public void onClick(View view) {
                Toast.makeText(MainActivity.this, "Play imageButton clicked", Toast.LENGTH_SHORT).show();
            }
        });
    }
}
3. Android ImageButton Attributes
| Attribute | Description |
|---|---|
| android:src | It is used to set the content in the image button |
4. Android ImageButton Example
Let’s take an example to understand Android ImageButton practically.
Step 4.1: Create New Project
Create a new project in Android Studio from File ⇒ New Project and select Empty Activity from the templates.
Step 4.2: Enable View Binding
In this example we are using Android Jetpack’s feature view binding.
plugins {
    id 'com.android.application'
    id 'org.jetbrains.kotlin.android'
}

android {
    ...
    ...

    buildFeatures {
        viewBinding = true
    }
    ...
    ...
}

dependencies {
    ...
    ...
    ...
}
Step 4.3: Add ImageButton to the XML Layout (UI)
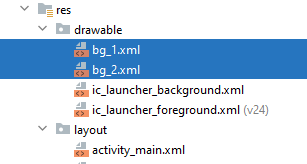
We created two drawable resources to decorate the UI (optional). Open the drawable folder and create two drawable resource files and add following codes.
<?xml version="1.0" encoding="UTF-8"?>
<shape xmlns:android="http://schemas.android.com/apk/res/android"
    android:shape="rectangle">

    <gradient
        android:angle="90"
        android:centerColor="#CAEDFF"
        android:endColor="#CAEDFF"
        android:startColor="#36B8FF"
        android:type="linear" />

</shape>
<?xml version="1.0" encoding="UTF-8"?>
<shape xmlns:android="http://schemas.android.com/apk/res/android"
    android:shape="oval">

    <gradient
        android:angle="90"
        android:centerColor="#FFA000"
        android:endColor="#FFA000"
        android:startColor="#E64A19"
        android:type="linear" />

</shape>
Open the xml layout file and add some ImageButtons to the layout. See the code below.
<?xml version="1.0" encoding="utf-8"?>
<RelativeLayout xmlns:android="http://schemas.android.com/apk/res/android"
    xmlns:tools="http://schemas.android.com/tools"
    android:layout_width="match_parent"
    android:layout_height="match_parent"
    android:background="@drawable/bg_1"
    tools:context=".MainActivity">

    <TextView
        android:id="@+id/textView12"
        android:layout_width="wrap_content"
        android:layout_height="wrap_content"
        android:layout_alignParentTop="true"
        android:layout_centerHorizontal="true"
        android:layout_marginTop="15dp"
        android:text="Media..."
        android:textColor="@color/black"
        android:textSize="18sp" />

    <LinearLayout
        android:layout_width="match_parent"
        android:layout_height="wrap_content"
        android:layout_centerInParent="true"
        android:gravity="center"
        android:orientation="horizontal">

        <ImageButton
            android:id="@+id/prevImageButton"
            android:layout_width="wrap_content"
            android:layout_height="wrap_content"
            android:background="@drawable/bg_2"
            android:contentDescription="previous"
            android:src="@android:drawable/ic_media_previous" />

        <ImageButton
            android:id="@+id/playImageButton"
            android:layout_width="wrap_content"
            android:layout_height="wrap_content"
            android:layout_marginStart="15dp"
            android:layout_marginEnd="15dp"
            android:background="@drawable/bg_2"
            android:contentDescription="play"
            android:minWidth="70dp"
            android:minHeight="70dp"
            android:src="@android:drawable/ic_media_play" />

        <ImageButton
            android:id="@+id/nextImageButton"
            android:layout_width="wrap_content"
            android:layout_height="wrap_content"
            android:background="@drawable/bg_2"
            android:contentDescription="next"
            android:src="@android:drawable/ic_media_next" />
    </LinearLayout>
</RelativeLayout>
Step 4.4: Update Activity File
We have successfully created the User Interface of the app. Let’s add some events to the UI. When the user clicks on the play button, the image of the play button will change. For this example we only display the toast on other ImageButton clicks.
This example doesn’t actually play any media. It’s just a graphical UI. We will create a music player in future tutorial. Leave a comment if you want.
package com.androidchunk.helloimagebutton

import android.os.Bundle
import android.view.View.OnClickListener
import android.widget.Toast
import androidx.appcompat.app.AppCompatActivity
import com.androidchunk.helloimagebutton.databinding.ActivityMainBinding

class MainActivity : AppCompatActivity() {

    //view binding
    private lateinit var binding: ActivityMainBinding
    private var isMediaPlaying = false

    override fun onCreate(savedInstanceState: Bundle?) {
        super.onCreate(savedInstanceState)
        binding = ActivityMainBinding.inflate(layoutInflater)
        setContentView(binding.root)

        //previous image button click event
        binding.prevImageButton.setOnClickListener(OnClickListener {
            Toast.makeText(this@MainActivity,"Previous button clicked",Toast.LENGTH_SHORT).show()
        })

        //play image button click event
        binding.playImageButton.setOnClickListener(OnClickListener {
            if (isMediaPlaying) {
                isMediaPlaying = false
                binding.playImageButton.setImageResource(android.R.drawable.ic_media_play)
                binding.textView12.text = "Media paused"
                Toast.makeText(this@MainActivity, "Media paused", Toast.LENGTH_SHORT).show()
            } else {
                isMediaPlaying = true
                binding.playImageButton.setImageResource(android.R.drawable.ic_media_pause)
                binding.textView12.text = "Media playing"
                Toast.makeText(this@MainActivity, "Media playing", Toast.LENGTH_SHORT).show()
            }
        })

        //next image button click event
        binding.nextImageButton.setOnClickListener(OnClickListener {
            Toast.makeText(this@MainActivity,"Next button clicked",Toast.LENGTH_SHORT).show()
        })
    }
}
package com.androidchunk.helloimagebutton;

import android.os.Bundle;
import android.view.View;
import android.widget.Toast;

import androidx.annotation.Nullable;
import androidx.appcompat.app.AppCompatActivity;

import com.androidchunk.helloimagebutton.databinding.ActivityMainBinding;

class MainActivity extends AppCompatActivity {

    //view binding
    private ActivityMainBinding binding;
    private boolean isMediaPlaying;

    @Override
    protected void onCreate(@Nullable Bundle savedInstanceState) {
        super.onCreate(savedInstanceState);
        binding = ActivityMainBinding.inflate(getLayoutInflater());
        setContentView(binding.getRoot());

        //previous image button click event
        binding.prevImageButton.setOnClickListener(new View.OnClickListener() {
            @Override
            public void onClick(View view) {
                Toast.makeText(MainActivity.this, "Previous button clicked", Toast.LENGTH_SHORT).show();
            }
        });

        //play image button click event
        binding.playImageButton.setOnClickListener(new View.OnClickListener() {
            @Override
            public void onClick(View view) {
                if (isMediaPlaying) {
                    isMediaPlaying = false;
                    binding.playImageButton.setImageResource(android.R.drawable.ic_media_play);
                    binding.textView12.setText("Media paused");
                    Toast.makeText(MainActivity.this, "Media paused", Toast.LENGTH_SHORT).show();
                } else {
                    isMediaPlaying = true;
                    binding.playImageButton.setImageResource(android.R.drawable.ic_media_pause);
                    binding.textView12.setText("Media playing");
                    Toast.makeText(MainActivity.this, "Media playing", Toast.LENGTH_SHORT).show();
                }
            }
        });

        //next image button click event
        binding.nextImageButton.setOnClickListener(new View.OnClickListener() {
            @Override
            public void onClick(View view) {
                Toast.makeText(MainActivity.this, "Next button clicked", Toast.LENGTH_SHORT).show();
            }
        });
    }
}
Run the application and check the output.
Step 4.5: Output
Happy coding!