
5th February, 2023
Fragment is an important topic of Android App Development. We already discussed about that. Now it’s time to practically implement Android fragment. We will create and embed an Android Activity fragment. let’s go.
Step 1: Create New Project
Create a new project in Android Studio from File ⇒ New Project and select Empty Activity from the templates.
Step 2: Add Fragment dependencies
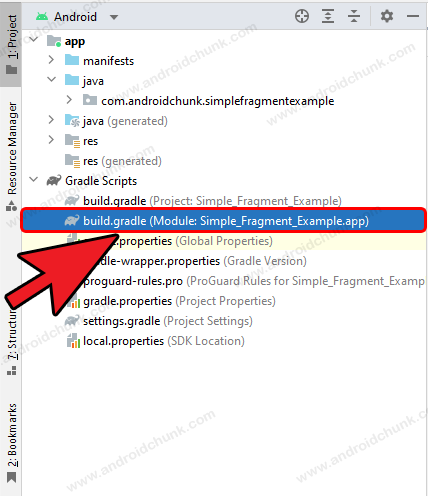
The first task is that you have to add the fragment library dependencies to the module level build.gradle file. To do this, Open the module level build.gradle gradle file and add the following code.
plugins {
    id 'com.android.application'
    id 'org.jetbrains.kotlin.android'
}

android {
    namespace 'com.androidchunk.simplefragmentexample'
    compileSdk 32

    defaultConfig {
        applicationId "com.androidchunk.simplefragmentexample"
        minSdk 22
        targetSdk 32
        versionCode 1
        versionName "1.0"
    }

    buildTypes {
        release {
            minifyEnabled false
            proguardFiles getDefaultProguardFile('proguard-android-optimize.txt'),
                    'proguard-rules.pro'
        }
    }
    compileOptions {
        sourceCompatibility JavaVersion.VERSION_1_8
        targetCompatibility JavaVersion.VERSION_1_8
    }
    kotlinOptions {
        jvmTarget = '1.8'
    }
}

dependencies {
    implementation 'androidx.core:core-ktx:1.7.0'
    implementation 'androidx.appcompat:appcompat:1.5.1'
    implementation 'com.google.android.material:material:1.7.0'
    // AndroidX Fragment library
    implementation 'androidx.fragment:fragment-ktx:1.5.5'
}
Step 3: Create Fragments
Open the project tool window by clicking on the project option from the Tool window bar. After that select the Android option from the drop-down and open the app → java hierarchy.
Right click on the package name and select New → Fragment → Fragment (Blank).

Type the name of the fragment as you wish and press the finish button.

We are going to create three fragments which are Orange Fragment , Yellow Fragment and Green Fragment. Repeat the above process to create all the fragments one by one.
Orange Fragment
package com.androidchunk.simplefragmentexample

import android.os.Bundle
import androidx.fragment.app.Fragment
import android.view.LayoutInflater
import android.view.View
import android.view.ViewGroup

/**
 * A simple [Fragment] subclass.
 */
class OrangeFragment : Fragment() {

    override fun onCreateView(
        inflater: LayoutInflater, container: ViewGroup?,
        savedInstanceState: Bundle?
    ): View? {
        // Inflate the layout for this fragment
        return inflater.inflate(R.layout.fragment_orange, container, false)
    }
}
<?xml version="1.0" encoding="utf-8"?>
<FrameLayout xmlns:android="http://schemas.android.com/apk/res/android"
    xmlns:tools="http://schemas.android.com/tools"
    android:layout_width="match_parent"
    android:layout_height="match_parent"
    android:background="@color/orange"
    tools:context=".OrangeFragment">
    <TextView
        android:layout_width="wrap_content"
        android:layout_height="wrap_content"
        android:layout_gravity="center"
        android:text="@string/hello_from_orange_fragment"
        android:textColor="#000000"
        android:textSize="20sp" />

</FrameLayout>
Yellow Fragment
package com.androidchunk.simplefragmentexample

import android.os.Bundle
import androidx.fragment.app.Fragment
import android.view.LayoutInflater
import android.view.View
import android.view.ViewGroup

/**
 * A simple [Fragment] subclass.
 */
class YellowFragment : Fragment() {

    override fun onCreateView(
        inflater: LayoutInflater, container: ViewGroup?,
        savedInstanceState: Bundle?
    ): View? {
        // Inflate the layout for this fragment
        return inflater.inflate(R.layout.fragment_yellow, container, false)
    }
}
<?xml version="1.0" encoding="utf-8"?>
<FrameLayout xmlns:android="http://schemas.android.com/apk/res/android"
    xmlns:tools="http://schemas.android.com/tools"
    android:layout_width="match_parent"
    android:layout_height="match_parent"
    android:background="@color/yellow"
    tools:context=".YellowFragment">
    <TextView
        android:layout_width="wrap_content"
        android:layout_height="wrap_content"
        android:layout_gravity="center"
        android:text="@string/hello_from_yellow_fragment"
        android:textColor="#000000"
        android:textSize="20sp" />

</FrameLayout>
Green Fragment
package com.androidchunk.simplefragmentexample

import android.os.Bundle
import androidx.fragment.app.Fragment
import android.view.LayoutInflater
import android.view.View
import android.view.ViewGroup

/**
 * A simple [Fragment] subclass.
 */
class GreenFragment : Fragment() {

    override fun onCreateView(
        inflater: LayoutInflater, container: ViewGroup?,
        savedInstanceState: Bundle?
    ): View? {
        // Inflate the layout for this fragment
        return inflater.inflate(R.layout.fragment_green, container, false)
    }
}
<?xml version="1.0" encoding="utf-8"?>
<FrameLayout xmlns:android="http://schemas.android.com/apk/res/android"
    xmlns:tools="http://schemas.android.com/tools"
    android:layout_width="match_parent"
    android:layout_height="match_parent"
    android:background="@color/green"
    tools:context=".GreenFragment">
    <TextView
        android:layout_width="wrap_content"
        android:layout_height="wrap_content"
        android:layout_gravity="center"
        android:text="@string/hello_from_green_fragment"
        android:textColor="#000000"
        android:textSize="20sp" />

</FrameLayout>
Step 4: Add Fragment Container in XML
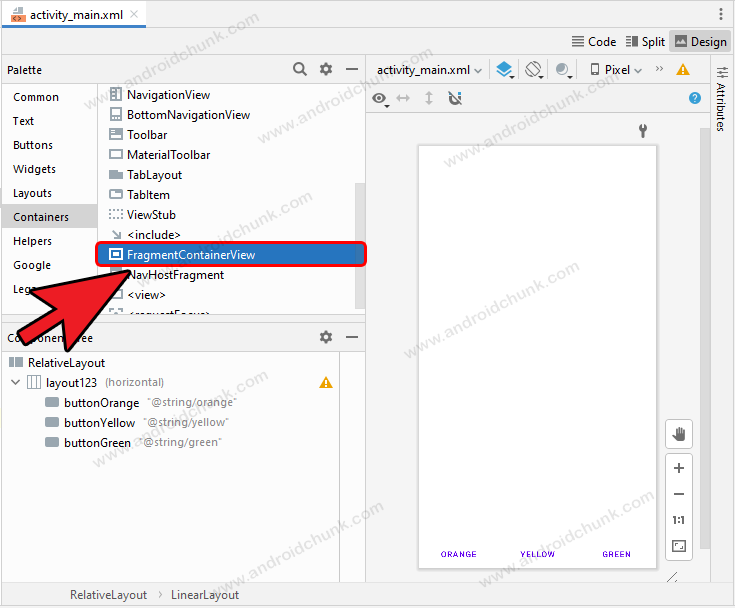
Now open the activity_main.xml file and expand the Palette from the UI Designer. Select the FragmentContainerView and drag it to the UI Design screen. Here we have also taken three buttons for the purpose of changing fragments.
<?xml version="1.0" encoding="utf-8"?>
<RelativeLayout xmlns:android="http://schemas.android.com/apk/res/android"
    xmlns:tools="http://schemas.android.com/tools"
    android:layout_width="match_parent"
    android:layout_height="match_parent"
    tools:context=".MainActivity">

    <!--This layout contains test buttons-->
    <LinearLayout
        android:id="@+id/layout123"
        android:layout_width="match_parent"
        android:layout_height="wrap_content"
        android:layout_alignParentBottom="true"
        android:orientation="horizontal">

        <!--Orange test button-->
        <Button
            android:id="@+id/buttonOrange"
            style="?android:attr/buttonBarButtonStyle"
            android:layout_width="0dp"
            android:layout_height="wrap_content"
            android:layout_weight="1"
            android:insetLeft="6dp"
            android:insetRight="6dp"
            android:text="@string/orange" />

        <!--Yellow test button-->
        <Button
            android:id="@+id/buttonYellow"
            style="?android:attr/buttonBarButtonStyle"
            android:layout_width="0dp"
            android:layout_height="wrap_content"
            android:layout_weight="1"
            android:insetLeft="6dp"
            android:insetRight="6dp"
            android:text="@string/yellow" />

        <!--Green test button-->
        <Button
            android:id="@+id/buttonGreen"
            style="?android:attr/buttonBarButtonStyle"
            android:layout_width="0dp"
            android:layout_height="wrap_content"
            android:layout_weight="1"
            android:insetLeft="6dp"
            android:insetRight="6dp"
            android:text="@string/green" />
    </LinearLayout>

    <!--Your fragment container is here!  -->
    <androidx.fragment.app.FragmentContainerView
        android:id="@+id/fragmentContainerView"
        android:layout_width="match_parent"
        android:layout_height="match_parent"
        android:layout_above="@id/layout123" />
</RelativeLayout>
Step 5: Embedding Fragments In Activity
Finally open the MainActivity.kt file and update the code as below.
package com.androidchunk.simplefragmentexample

import android.os.Bundle
import android.view.View
import androidx.appcompat.app.AppCompatActivity
import androidx.fragment.app.commit
import androidx.fragment.app.replace

class MainActivity : AppCompatActivity() {
    override fun onCreate(savedInstanceState: Bundle?) {
        super.onCreate(savedInstanceState)
        setContentView(R.layout.activity_main)

        //get UI References
        val btnOrange = findViewById<View>(R.id.buttonOrange)
        val btnYellow = findViewById<View>(R.id.buttonYellow)
        val btnGreen = findViewById<View>(R.id.buttonGreen)

        //implement click listeners
        btnOrange.setOnClickListener { openFragment(btnOrange.id) }
        btnYellow.setOnClickListener { openFragment(btnYellow.id) }
        btnGreen.setOnClickListener { openFragment(btnGreen.id) }
    }

    private fun openFragment(viewId: Int) {

        supportFragmentManager.commit {
            setReorderingAllowed(true)

            when (viewId) {
                R.id.buttonOrange -> {
                    replace<OrangeFragment>(R.id.fragmentContainerView)
                }
                R.id.buttonYellow -> {
                    replace<YellowFragment>(R.id.fragmentContainerView)
                }
                R.id.buttonGreen -> {
                    replace<GreenFragment>(R.id.fragmentContainerView)
                }
            }
        }
    }
}
<resources>
    <string name="app_name">Simple Fragment Example</string>
    <string name="orange">Orange</string>
    <string name="yellow">Yellow</string>
    <string name="green">Green</string>
    <string name="hello_from_orange_fragment">Hello From Orange Fragment!</string>
    <string name="hello_from_yellow_fragment">Hello From Yellow Fragment!</string>
    <string name="hello_from_green_fragment">Hello From Green Fragment!</string>
</resources>
<?xml version="1.0" encoding="utf-8"?>
<resources>
    <color name="purple_200">#FFBB86FC</color>
    <color name="purple_500">#FF6200EE</color>
    <color name="purple_700">#FF3700B3</color>
    <color name="teal_200">#FF03DAC5</color>
    <color name="teal_700">#FF018786</color>
    <color name="black">#FF000000</color>
    <color name="white">#FFFFFFFF</color>
    <color name="orange">#FF5500</color>
    <color name="yellow">#FFFF00</color>
    <color name="green">#00FF00</color>
</resources>
Happy coding!